How to Make a Cardboard Gift Box With a Paper-Covered Lid
Size a rigid two-piece gift box to the present, cut the base and lid from chipboard, tape the corners and wrap both in decorative paper with neat corners. Includes a worked example and the sums for any size.

Project at a glance
Materials
- Chipboard, about 1/16 in thick
- Decorative paper
- Paper tape or masking tape
- Glue stick or white (PVA) glue
- Metal ruler and pencil
- Craft knife and cutting mat
- Ribbon and tissue paper
A handmade cardboard gift box looks finished when it is rigid and every edge is hidden. The method here is the traditional one: a base and a separate lid made from dense board, corners held with tape, then both pieces wrapped in decorative paper.
You size the box to the present, so the numbers below are a worked example. Run the same sums with your own measurements.
Board, Paper and Tools
- Chipboard about 1/16 in (1.5 mm) thick, or two or three layers of thin paperboard glued together to the same thickness
- Decorative paper of medium weight, such as gift wrap or printed craft paper
- Paper tape or masking tape for the corners
- Glue stick, or white (PVA) glue and a flat brush
- Metal ruler, pencil, scissors
- Craft knife and self-healing cutting mat
Corrugated cardboard is too bulky for this project, and its flutes show through paper. For a simpler box folded from one piece with glue tabs, make the easy cardboard box with a lid instead.
Safety note
Chipboard is dense, and cutting it with a craft knife is a job for an adult. Work on a cutting mat against a metal ruler, with several light passes instead of one hard one, fingers behind the cutting path and the blade moving away from your body. Keep the blade sharp and cap or retract it when you put it down. Laminated thin paperboard can be cut with scissors instead.
Measure the Gift and Size the Box
Measure the length, width and height of the gift at its widest points. Add 1/4 in (6 mm) to each for clearance and tissue.
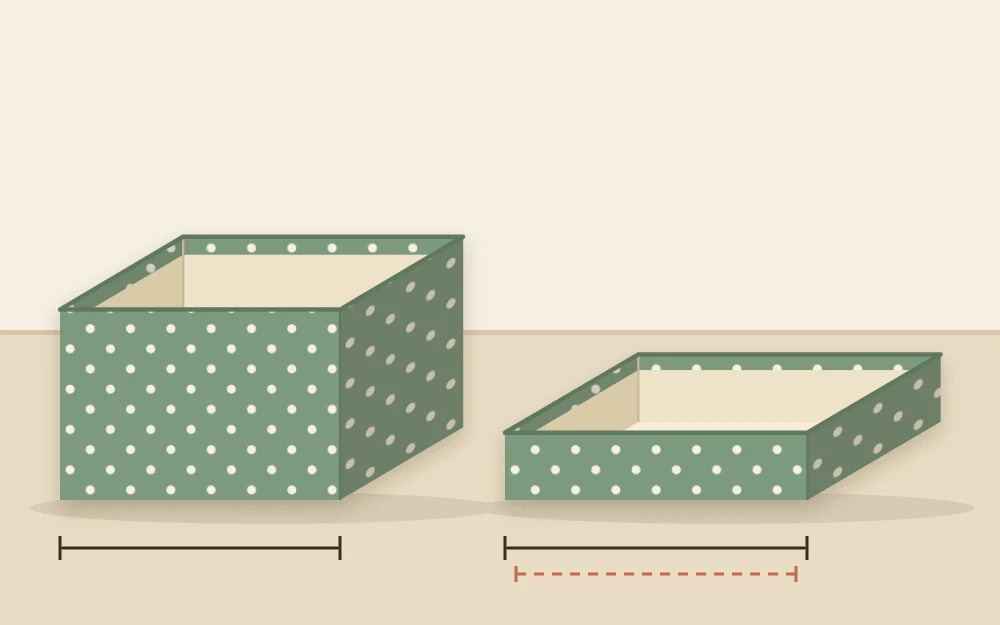
The example gift is 4 x 3 x 1 1/2 in (10 x 7.5 x 4 cm), so the inside of the box is 4 1/4 x 3 1/4 x 1 3/4 in. The lid base is 1/4 in larger than the box base in both directions, and the lid walls are 1 in (2.5 cm) tall.
| Piece | Base rectangle | Wall height | Board to cut |
|---|---|---|---|
| Box | 4 1/4 x 3 1/4 in | 1 3/4 in | 7 3/4 x 6 3/4 in |
| Lid | 4 1/2 x 3 1/2 in | 1 in | 6 1/2 x 5 1/2 in |
Each board is the base plus two wall heights: 4 1/4 + 3 1/2 = 7 3/4 in and 3 1/4 + 3 1/2 = 6 3/4 in for the box. The lid adds 2 in each way.
The lid allowance covers two wall thicknesses, 2 x 1/16 in, plus 1/8 in (3 mm) for the paper and a sliding fit. With thicker board, use two board thicknesses plus 1/8 in.
Cut and Fold the Base and Lid
- Draw the board rectangle for the box, then draw a line one wall height (1 3/4 in) inside each edge. The center rectangle is the base.
- Cut out the rectangle, then cut away the four corner squares completely. A rigid box has no glue tabs.
- Crease the four sides of the base. On chipboard, draw the knife lightly along each line so it cuts only about halfway through the board. On laminated paperboard, press a firm score instead.
- Fold the walls up, away from the creased face, so the creases end up on the outside of the box.
- Repeat for the lid, with the lines 1 in inside each edge.
Folding this way keeps the inside of the box at the size you drew.
Tape the Corners
- Cut four pieces of tape for the box, each a little shorter than the wall height.
- Hold two walls together so their edges meet squarely, and run a piece of tape down the outside of the corner. Rub it down firmly on both walls.
- Tape the other three corners, then do the same for the lid.
- Dry fit the lid on the box. It should slide on with a small, even gap all around, which the paper will take up.
Wrap the Box in Decorative Paper
Cut the paper so it reaches up each wall and 1/2 in (12 mm) over the rim. That means adding the wall height plus 1/2 in on every side of the base rectangle. For the example box this is 4 1/4 + 4 1/2 = 8 3/4 in by 3 1/4 + 4 1/2 = 7 3/4 in. The lid paper is 7 1/2 x 6 1/2 in.
- Lay the paper face down. Glue the underside of the box and press it onto the center, with the same margin showing on opposite sides.
- At each corner, cut the paper from its outer edge straight in to the corner of the box, following the line of a long wall. The two long flaps now run the full length of the paper, and the two short flaps are only as wide as the short walls.
- Trim each end of the long flaps so that only a 1/2 in tab extends past the box corner, and cut the outer end of each tab away diagonally at 45 degrees.
- Glue one long flap up its wall, wrap the two tabs around the corners onto the short walls, then fold the top margin over the rim and press it down inside. Repeat with the other long flap.
- Shave a sliver, about 1/16 in, off both sides of each short flap so it stops just shy of the corners. Glue it up over the tabs and fold it over the rim.

Wrap the lid the same way, with a thin, even layer of glue on the board. The guide to painting and covering cardboard explains how to keep paper from bubbling and board from warping.
Line the Inside
The bare floor of the box still shows. Cut a liner from thin paperboard, 1/8 in smaller than the inside in each direction, which is 4 1/8 x 3 1/8 in for the example. Cover it with paper, wrapping the edges onto the back, and glue it to the floor.
A quicker option is two sheets of tissue paper laid across each other, with the ends folded over the gift.
Ribbon and Tag Ideas
- Tie a ribbon around the closed box in one direction only, so the pattern of the paper stays visible.
- Wrap the lid in patterned paper and the base in a plain color picked from the pattern.
- Cut a tag from a board offcut, cover it in the same paper, punch a hole and thread it onto the ribbon.
Let everything dry for several hours before packing the gift, so the lid does not stick to the base. The box suits light, dry presents. For presents to put inside it, browse these handmade cardboard gift ideas.
Frequently asked questions
What paper works best for covering a gift box?
Medium-weight paper is the easiest: ordinary gift wrap, printed craft paper or plain kraft paper. Very thin paper wrinkles and shows glue, while thick cardstock cracks at the rim and makes the lid tight. If you use a heavier paper, add a little more clearance to the lid base before cutting.
How much bigger should the lid be than the box?
The lid base should be larger than the box base by two board thicknesses plus about 1/8 in for the layers of paper and a sliding fit. With board 1/16 in thick, that comes to 1/4 in in each direction. Always check with a dry fit before wrapping either piece.
Can I make a rigid box without chipboard?
Yes. Glue two or three layers of thin paperboard together with thin, even coats of white glue and press them flat under books until dry. The laminated sheet behaves much like chipboard, cuts with scissors, and can be scored with a blunt tool instead of being part-cut with a knife.