How to Make a Cardboard Box With a Lid: An Easy First Project
Draw one cross-shaped net, score it, fold it and glue four corner tabs to make a small 4 x 4 x 2 in box, then repeat with slightly different numbers for the lid. Includes the arithmetic for any other size.
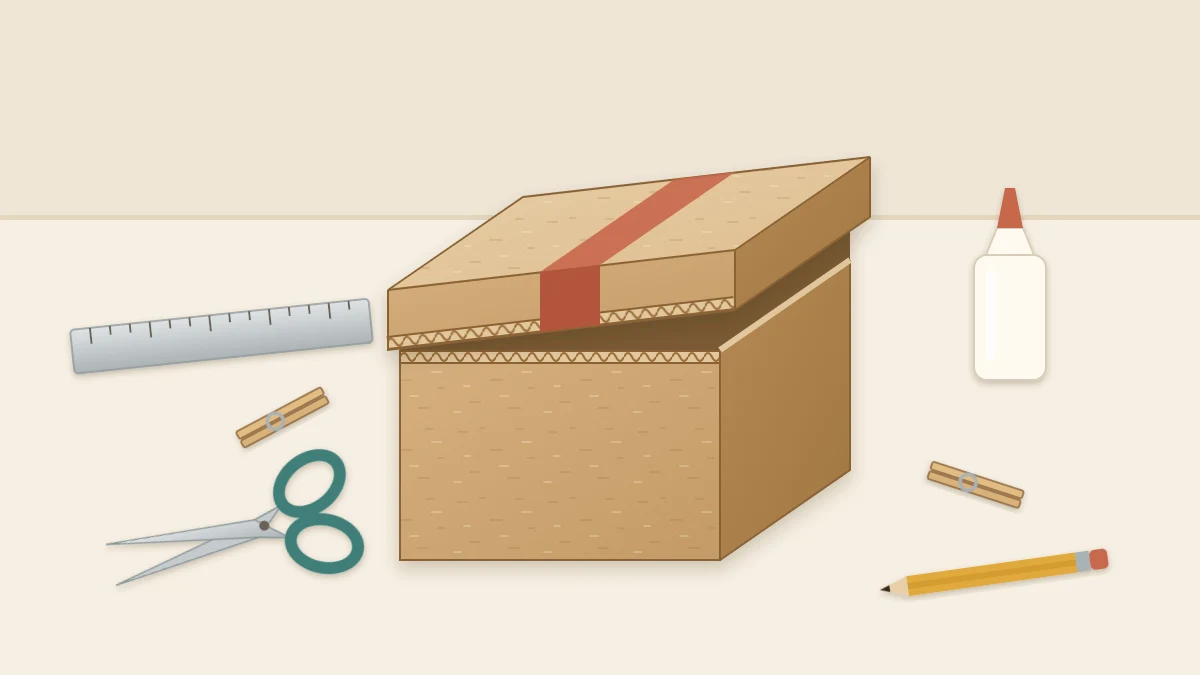
Project at a glance
Materials
- Cardboard sheet, at least 8 x 15 in
- Metal ruler and pencil
- Scissors, or craft knife and cutting mat
- Bone folder or other blunt scoring tool
- White (PVA) glue
- Eight clothespins or binder clips
If you want to learn how to make a cardboard box, start small. This one is about 4 x 4 x 2 in (10 x 10 x 5 cm), it folds up from a single flat piece, and it uses only three skills: cutting, scoring and gluing. The lid is the same pattern again, drawn a little wider and a lot shallower.
The flat pattern is called a net, and you draw it yourself with a ruler and pencil. Once you have made one, you can change three numbers and build a box of almost any size.
What You Need
- One piece of clean single-wall corrugated cardboard, at least 8 x 15 in (20 x 38 cm), or thin paperboard (cereal-box weight) of the same size
- Metal ruler and a sharp pencil
- Scissors, or a craft knife and a self-healing cutting mat
- A blunt scoring tool, such as a bone folder
- White (PVA) glue
- Eight clothespins or small binder clips
Single-wall corrugated is roughly 1/8 in (3 mm) thick and gives a firm little box. Thin paperboard gives a lighter box and can be cut entirely with scissors, which makes it the easier choice for a very first attempt.
Safety note
Knife work is a job for an adult. Cut on a cutting mat against a metal ruler, in several light passes instead of one hard one, with your fingers behind the cutting path and the blade moving away from your body. Use a sharp blade and cap or retract it whenever you put it down. Scissors and thin paperboard, or a safety cutter with a shielded blade, are good alternatives.
Draw the Box Net
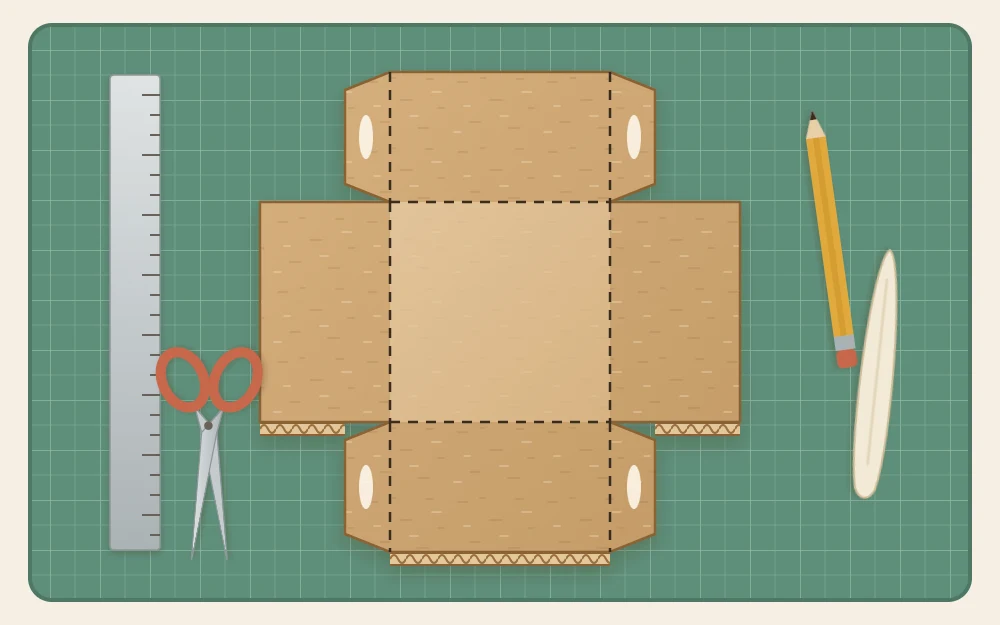
The net is a cross: a square base in the middle with one wall on each side. A 4 in (10 cm) base with 2 in (5 cm) walls needs an 8 x 8 in (20 x 20 cm) square, because 2 + 4 + 2 = 8 in each direction.
- Mark out an 8 x 8 in square, measuring from one straight edge of the sheet.
- Draw two lines across it, 2 in and 6 in from the left edge. Draw two more, 2 in and 6 in from the top edge.
- You now have nine areas. The center 4 x 4 in square is the base. The four 4 x 2 in rectangles touching it are the walls. The four 2 x 2 in corner squares become the glue tabs.
- Choose two opposite walls to carry the tabs, for example the top and bottom walls of your drawing. In each corner square, draw a line 3/4 in (2 cm) away from that wall and parallel to its short end. The 3/4 x 2 in strip next to the wall is the glue tab. The rest of the corner square is waste.
Cut and Score the Net
- Cut around the outside of the 8 x 8 in square.
- At each corner, cut along the line between the corner square and the wall that has no tab, stopping exactly at the corner of the base. Then cut along your tab line and remove the waste piece.
- Snip the two free corners of every tab at an angle so they do not catch when you fold them in.
- Score the four sides of the base and the four short lines where the tabs join their walls. That makes eight scored lines in total.
If your folds usually crack or wander, the guide on measuring, scoring and folding covers the technique in detail.
Fold, Glue and Clip
- Fold all four walls up and all four tabs inward, then let them relax. This dry fit shows you whether every tab sits flat against the inside of its neighboring wall.
- Spread a thin, even layer of white glue on the outer face of one tab.
- Bring the two walls together with the tab on the inside and the top edges level. Hold the joint with a clothespin.
- Repeat on the other three corners, checking that the box stays square as you go.
- Leave the clips on for roughly 20 to 30 minutes, until the glue is firm enough to handle. Full strength takes several hours or overnight.

For more on adhesives and why joints sometimes pop open, see the guide to gluing cardboard.
Make the Lid
The lid is a second net built the same way. Only two numbers change: the base grows so the lid can slide over the box, and the walls shrink to 1 in (2.5 cm).
| Part | Corrugated box | Thin paperboard box |
|---|---|---|
| Lid base | 4 3/8 in (11 cm) square | 4 1/8 in (10.5 cm) square |
| Lid walls | 1 in (2.5 cm) | 1 in (2.5 cm) |
| Square to cut | 6 3/8 in (16 cm) | 6 1/8 in (15.5 cm) |
The extra width is about three board thicknesses for corrugated, 3 x 1/8 in, which is 3/8 in (1 cm). Thin paperboard needs only 1/8 in. Draw the fold lines 1 in from each edge of the square, keep the tabs 3/4 in wide, then cut, score, glue and clip exactly as before.
Tip
Finish the box before you draw the lid. Measure across the outside of the glued box and check that your lid base is slightly larger, because boards vary.
How to Resize the Box
Every size follows the same arithmetic. Decide the length, width and height you want, then calculate the sheet:
- Sheet length = base length + 2 x wall height
- Sheet width = base width + 2 x wall height
- Corner squares = wall height x wall height
A 6 x 4 in (15 x 10 cm) box with 3 in (7.5 cm) walls needs a sheet of 12 x 10 in (30 x 25 cm): 6 + 3 + 3 = 12 and 4 + 3 + 3 = 10. Draw the fold lines 3 in from each edge and the corner squares will be 3 x 3 in. Tabs can stay 3/4 in wide for small boxes. Widen them to about 1 in for walls taller than 4 in.
Boxes made this way suit light, dry items such as paper clips, craft supplies, jewelry or a small present.
Where to Go Next
When the plain version feels easy, the next step up is a rigid two-piece gift box covered in decorative paper. It is built from dense board with taped corners instead of glue tabs, and the wrapping hides every edge.
Frequently asked questions
Can I make this box with scissors only?
Yes. Use thin paperboard of cereal-box weight, which scissors cut cleanly, and score the fold lines with a blunt tool. The box will be lighter than a corrugated one but perfectly usable for small, dry items. Add only 1/8 in to the lid base, since thin board takes up very little room.
Why is my lid too tight or too loose?
The lid base has to be slightly larger than the outside of the finished box, and boards differ in thickness. Measure across the glued box before drawing the lid and add about 1/8 in of clearance beyond the thickness of the two lid walls. If a lid is loose, a strip of paper glued inside the rim tightens it.
Which way should the flutes run on a small box?
On a box this small it matters little, because the walls are short and well supported by the corner tabs. If you have a choice, let the flutes run up the taller pair of walls. Folds across the flutes tend to be crisper, while folds along them need a firmer score.