How to Design Your Own Cardboard Templates and Nets
Turn any idea into a pattern you drew yourself: list the faces, unfold them into a net, count the glue tabs, allow for board thickness and prove it with a paper mockup before cutting cardboard.
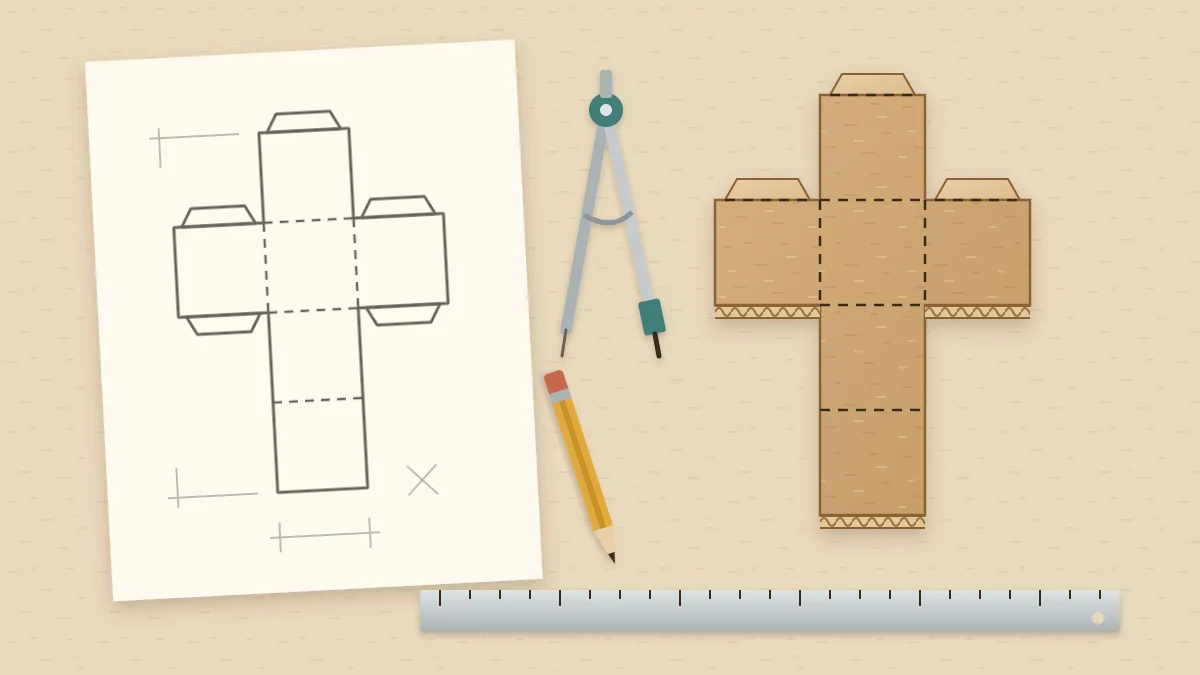
Project at a glance
Materials
- Plain paper for sketches and mockups
- Metal ruler and pencil
- Compass for triangles and circles
- Scissors
- Masking tape
- Thin paperboard for a master pattern
Searching for ready-made cardboard templates takes time, and the result rarely fits the box, the board or the space you actually have. Drawing your own pattern is quicker than it sounds, and it follows the same few steps whether the object is a tray, a small house or a faceted ornament.
The method is simple: break the object into flat faces, unfold those faces into a net, add glue tabs, allow for the thickness of the board and test the pattern in paper before cutting cardboard. A small open box serves as the worked example throughout.
Start With a Sketch and Three Measurements
Draw the object roughly, from an angle that shows three sides. Accuracy does not matter yet; the sketch is there to make you decide what the thing is. Then write down its length, width and height. If it has to hold something or fit somewhere, measure that item or that space first and add about 1/8 in (3 mm) of clearance in each direction.
The example is an open-top box 4 in long, 3 in wide and 2 in tall (10 x 7.5 x 5 cm).
List the Faces
Every flat surface of the object is a face. Write each one down with its size, and count them. The open box has five:
- One base, 4 x 3 in
- Two long walls, 4 x 2 in
- Two short walls, 3 x 2 in
Sloped objects still reduce to faces: a roof is two rectangles, and a gable end is a rectangle with a triangle on top.
Unfold the Faces Into a Net
A net is the flat pattern that folds into a 3D shape. To find it, imagine the object made of hinged panels and lower each wall outward until everything lies flat. Faces that share an edge in the object stay joined along that edge in the net wherever possible, because every shared edge becomes a fold instead of a glue seam.
On scrap paper, draw the base of the box first. Attach a long wall to each long side and a short wall to each short side. The result is a cross that measures 4 + 2 + 2 = 8 in one way and 3 + 2 + 2 = 7 in the other, so the net fits on a blank of 8 x 7 in (20 x 18 cm).
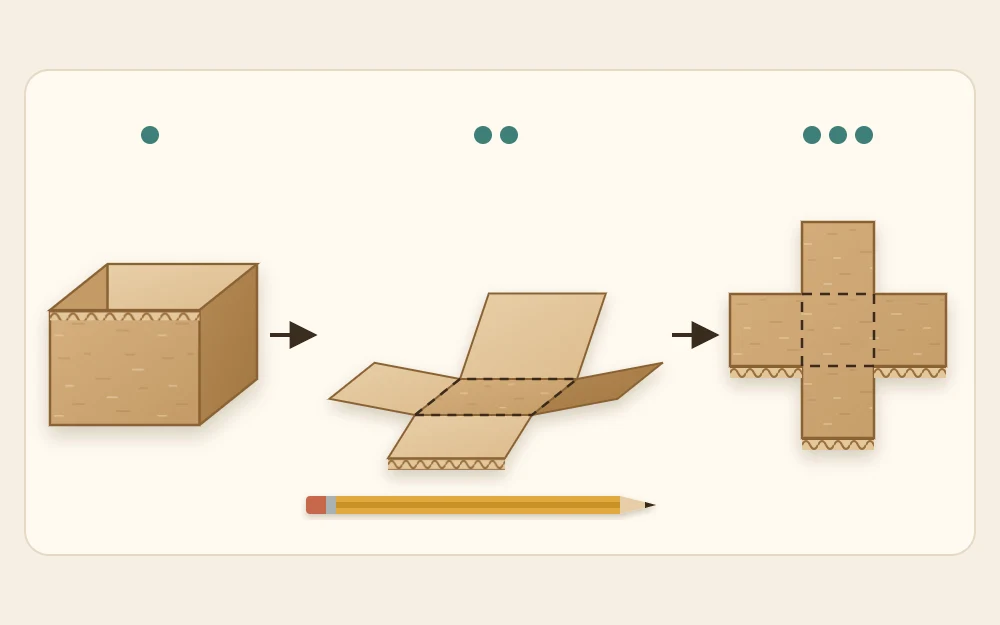
Most objects have more than one valid net; mathematicians have catalogued the nets of many solid shapes. Choose the one that wastes the least board. For practice with closed shapes, the cube, pyramid and gem in the guide to simple 3D cardboard shapes are good next nets to draw.
Add Glue Tabs
Wherever two faces meet in the object but are not joined in the net, one of them needs a glue tab. A counting rule tells you how many:
- Count the edges of the finished object where two faces meet.
- Count the fold lines between faces in your net.
- Subtract. The difference is the number of seams, and each seam needs one tab.
The open box has eight such edges: four around the base and four upright corners. The net has four folds, so 8 – 4 = 4 tabs. Put one on each end of both long walls. A closed cube has twelve edges and a net with five folds, so it needs seven.
Make tabs 1/2 in (1.2 cm) wide for small models in thin paperboard and up to 3/4 in (2 cm) for larger ones. Cut both ends of each tab at a slant so neighboring tabs do not collide inside a corner.
Allow for Board Thickness
Thin paperboard is so slim that you can ignore its thickness. Corrugated board is not: single-wall is roughly 1/8 in thick and double-wall roughly 1/4 in (6 mm). Two rules cover most cases:
- A part that fits between two walls loses two board thicknesses. A divider across a box 3 in wide on the outside, made of 1/8 in board, is 3 – 1/4 = 2 3/4 in (7 cm) long.
- A part that wraps around another gains two thicknesses plus clearance. A lid for the same box needs an inside width of at least 3 in plus about 1/8 in so it slides on.
Test With a Paper Mockup
Before any cardboard is cut, draw the net at full size on plain paper, cut it out with scissors, fold it and hold it together with small pieces of masking tape. Five minutes with a mockup shows errors that are hard to see in a flat drawing:
- Edges that should meet but differ in length
- Tabs on the wrong side of a seam, or two tabs on the same seam
- Proportions that looked right on paper and look squat or spindly in the hand
Sloping parts are the usual trap. On a small house with a gable 3 in wide that rises 1 1/2 in (4 cm) at the center, each sloping edge is about 2 1/8 in (5.4 cm) long, not 1 1/2 in. The roof panels have to match that sloping length, plus any overhang. Measure such edges on the drawing with a ruler instead of guessing.
Write corrections on the mockup, then redraw the net. For very small subjects, where a 1/16 in (1.5 mm) error shows, read the guide to mini cardboard models first.

Transfer to Cardboard and Keep a Master
Redraw the corrected net directly on the board, measuring from one straight edge, with fold lines running along the flutes where you have the choice. Then score the folds and cut the outline; the guide on measuring, scoring and folding cardboard covers both steps.
If you expect to make the object again, cut one extra copy from thin paperboard and keep it as a master. Label it with the object’s name, its finished size, the board it was designed for and an arrow for flute direction. Next time, lay the master on the board and draw around it.
Why Your Own Design Is Worth the Effort
A pattern you drew fits your material and your purpose, and you can resize it at will because you know where every number came from. To scale a net, multiply every face dimension by the same factor and leave the tab width alone.
It also keeps your work original. A commercial pattern is someone else’s design, and copying it, or passing copies on, is not yours to decide. A net built from your own sketch and measurements is free to share, change and repeat.
Frequently asked questions
How do I know where to put the glue tabs on a net?
Look for every pair of edges that will meet when the net is folded but are not already joined by a fold. Each of those seams needs one tab, on either of the two edges. Folding a quick paper mockup makes the pairs obvious, and shows at once if a seam was given two tabs or none.
Do I need special software to design a cardboard pattern?
No. A pencil, a ruler and scrap paper are enough for boxes, houses and most small models, and a compass handles triangles and circles. Drawing by hand at full size has an advantage: the drawing can be cut out and folded straight away as a test.
How do I resize a net I have already drawn?
Multiply the dimensions of every face by the same number, then redraw. Keep the glue tabs at their original width unless the model becomes much larger. If the board changes as well, recheck any part that fits inside or around another, because the thickness allowance changes with it.