How to Make a Cardboard Desk Organizer With Compartments
Build a stepped desk organizer 9 in wide from one shipping box: a full cutting list, where to cut the steps, the assembly order and simple rules for changing the size.
Project at a glance
Materials
- Single-wall corrugated cardboard
- Metal ruler and pencil
- Craft knife or safety cutter and cutting mat
- White (PVA) glue
- Binder clips or masking tape
- Decorative paper and glue stick
Pens in a mug, sticky notes under the keyboard, paper clips loose in a drawer: most desks need a few small compartments more than they need another gadget. A cardboard desk organizer gives you exactly the compartments you want, sized to your own supplies, from one flattened shipping box.
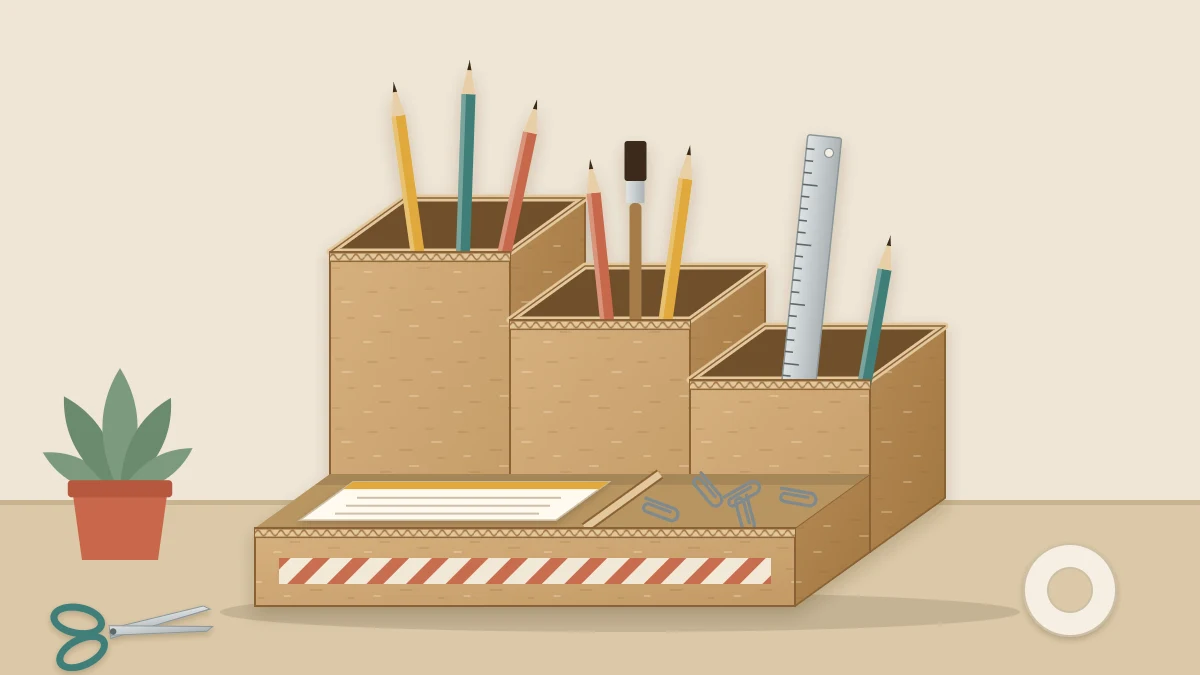
This design is a stepped organizer 9 in (23 cm) wide and 5 in (12.5 cm) deep. Three back compartments of different heights take pens, scissors and rulers, and a low front tray keeps notes and clips within reach. Every part is a rectangle or a rectangle with one or two steps cut out of it.
How the organizer goes together
The walls stand on top of a flat base, so the base sets the footprint. The back wall and the front wall run the full width. The two sides fit between them, and a middle wall and two small dividers fit between the sides. The back wall is two layers glued together, because that is where tall pens lean.
The plan assumes single-wall corrugated cardboard about 1/8 in (3 mm) thick. If yours is noticeably thicker, use the resizing rules near the end.
Cutting list
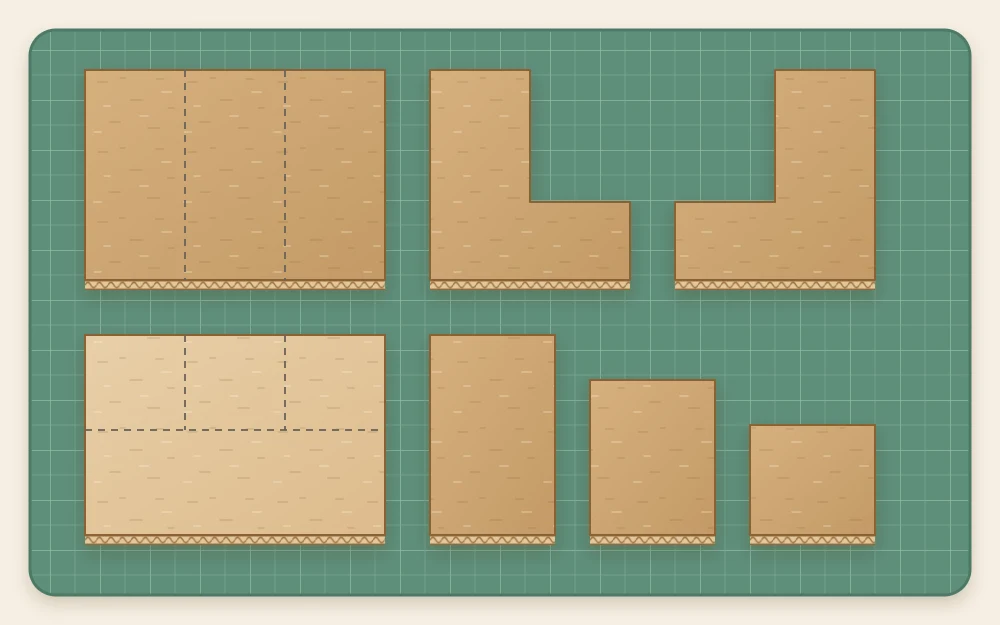
Mark every part from one straight reference edge and check the corners for square; the guide to measuring and marking cardboard accurately explains the method. Lay out the walls so the flutes run vertically, from the desk upward.
| Part | Quantity | Size (width x height) |
|---|---|---|
| Base | 1 | 9 x 5 in (23 x 12.5 cm) |
| Back wall | 2 | 9 x 5 in (23 x 12.5 cm) |
| Front wall | 1 | 9 x 1 1/2 in (23 x 3.8 cm) |
| Side | 2 | 4 5/8 x 5 in (11.7 x 12.5 cm) |
| Middle wall | 1 | 8 3/4 x 4 in (22.2 x 10 cm) |
| Tall divider | 1 | 2 x 4 in (5 x 10 cm) |
| Short divider | 1 | 2 x 3 in (5 x 7.5 cm) |
The numbers add up like this: the doubled back wall is 1/4 in (6 mm) thick and the front wall is 1/8 in, so the sides are 5 in less 3/8 in, or 4 5/8 in. The middle wall sits between the two sides, so it is 9 in less 1/4 in, or 8 3/4 in.
Cutting the steps
Three parts need a step cut into the top edge.
- Sides: each side is tall at the back and low at the front. Measure 2 1/8 in (5.4 cm) along the top from the back edge and draw a line straight down. Measure 1 1/2 in up from the bottom and draw a line to the front edge. Cut away the top front rectangle, which is 2 1/2 in wide and 3 1/2 in tall. Make the second side a mirror image so both good faces point outward.
- Middle wall: from the left end, mark 3 1/8 in (8 cm) and 6 1/4 in (15.9 cm) along the top. Leave the left section at 4 in tall, cut the center section down to 3 in and the right section down to 2 in.
Those steps give back compartments 3 in, 3 in and 2 1/2 in wide, each 2 in from front to back. The front tray ends up 8 3/4 in wide and 2 1/2 in deep.
Safety note
Cutting corrugated board with a craft knife is a job for an adult. Work on a cutting mat with a metal ruler, make several light passes instead of one hard one, keep your fingers behind the cutting path and cut away from your body. Cap or retract the blade whenever you put it down. A safety cutter with a shielded blade is a good alternative, and if you build the organizer from laminated thin paperboard, scissors will do the whole job.
Assembly order
Do a dry fit first: stand every part in place without glue and check that the sides and middle wall slide in without bowing. Shave a sliver off any part that is tight. Then glue with white (PVA) glue in thin, even coats.
- Glue the two back wall pieces face to face and press them under a few books for roughly 20 to 30 minutes. The guide on laminating layers for stiffness explains why a doubled panel resists bending so much better.
- Run glue along the bottom edge of the back wall and stand it on the back edge of the base, flush with the outside.
- Glue the two sides to the base and to the front face of the back wall, tall ends at the back. Hold the corners with binder clips or strips of masking tape.
- Glue the front wall across the front edge of the base, covering the ends of both sides.
- Slide in the middle wall where the sides step down, 2 in in front of the back wall, with its tallest section on the left.
- Glue the tall divider behind the first step of the middle wall and the short divider behind the second step.
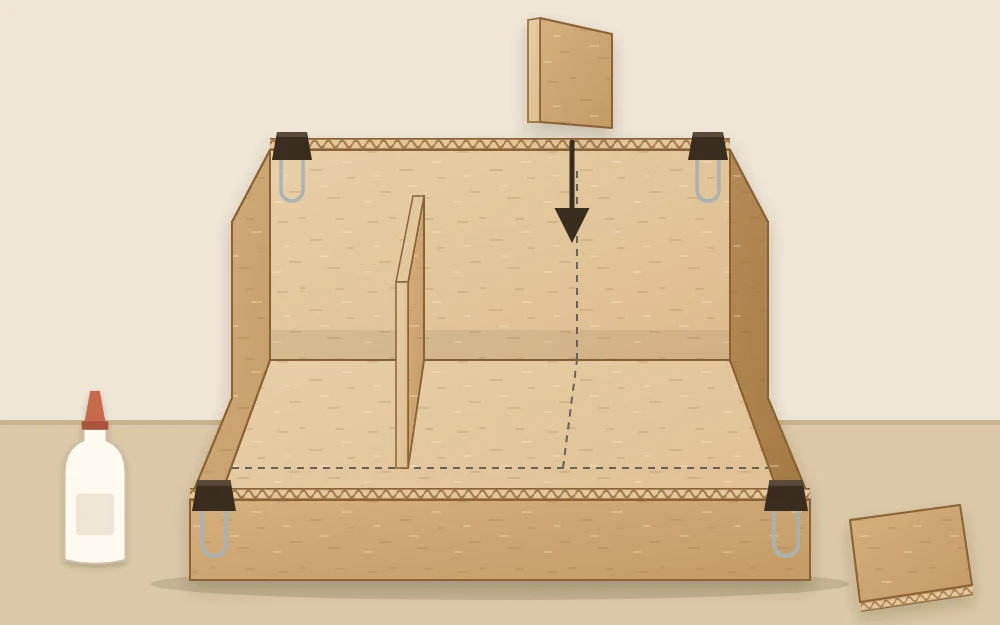
Leave the organizer for several hours, or overnight, before you load it.
Covering with paper
Decorative paper hides the corrugated edges and the joints. Cover the outside first, in this order: back, sides, front. Cut each piece about 1/2 in (12 mm) taller than the wall so it folds over the top edge, and snip the paper at each step so it wraps neatly.
Use a glue stick or a very thin coat of white glue, and smooth from the center outward. Cover the middle wall and both dividers before you glue them in; it is far easier on the table than inside a finished compartment.
Changing the size
Two rules keep the parts fitting when you resize, where “thickness” means your board thickness:
- Side length = depth of the base, less three thicknesses.
- Middle wall width = width of the base, less two thicknesses.
For a wider organizer, add the same amount to the base, both back wall pieces, the front wall and the middle wall. For a different split at the back, move the two step marks on the middle wall; each divider sits just behind its step.
Making it part of a set
The front tray is one open space. To split it into smaller cells for clips and erasers, cut two or three low strips and join them with half-height slots, the same method used for a slot-together drawer grid.
For workbooks and folders that are too tall for any compartment, an upright magazine holder cut from a shipping box covered in the same paper turns the two pieces into a matching desk set. Both are meant for light, dry desk supplies, so keep drinks and plant pots elsewhere.
Frequently asked questions
Can I make the organizer from cereal-box card instead of corrugated cardboard?
Yes, if you glue two or three layers of thin paperboard together for each part and let them dry flat under books. Measure the thickness of your laminated board and adjust the side length and middle wall width with the two resizing rules, since those parts depend on thickness.
Why is only the back wall doubled?
Tall pens, rulers and scissors tip backward and rest on the back wall, so it gets the most pushing. A second layer keeps it flat. If your board feels flimsy you can double the base as well, which adds stiffness without changing any of the other measurements in the cutting list.
How do I stop the walls from leaning while the glue dries?
Hold each corner with a binder clip or a strip of masking tape, and check with the corner of a sheet of paper that the walls stand square before you walk away. Thin coats of white glue grab faster than thick ones and are less likely to let parts slide.