Cardboard Drawer Dividers: A Custom Slot-Together Grid
Measure your drawer, plan a grid on paper and cut slotted cardboard strips that slide together without glue. Includes a worked example and fixes for a loose or tight fit.

Project at a glance
Materials
- Single-wall corrugated cardboard
- Metal ruler and pencil
- Tape measure
- Craft knife or safety cutter and cutting mat
- Paper tape for the top edges
A drawer without compartments turns into one layer of everything. Store-bought inserts rarely match the drawer you actually have, which leaves gaps at the sides where small things slide underneath.
Cardboard drawer dividers solve that because you cut them to your own measurements. The grid described here is made of strips that slot into each other at half height. It needs no glue, lifts out in one piece, and can be rearranged whenever the contents of the drawer change.
Measure the inside of the drawer
Empty the drawer and take three measurements on the inside:
- Width, side to side. Measure at the front and at the back, and use the smaller number.
- Depth, front to back, measured along the drawer floor.
- Height of the drawer side, from the floor to the top edge.
The worked example below uses a drawer that is 16 in (40.5 cm) wide, 12 in (30.5 cm) front to back and 3 in (7.5 cm) high inside. Swap in your own numbers as you go.
Make the strips about 1/4 in (6 mm) lower than the drawer side so nothing catches when the drawer closes. For the example, that gives a strip height of 2 3/4 in (7 cm).
Plan the grid on paper
Sketch the drawer as a rectangle and draw in the dividers, with long compartments for pencils or utensils and squarer ones for socks or small boxes.
The example uses two long strips running side to side and three short strips running front to back. That makes three rows and four columns, twelve compartments in all, each a little under 4 in (10 cm) square.
To find where the strips cross, divide each inside measurement by the number of compartments along it:
- Width: 16 in divided by 4 columns is 4 in, so the long strips get slots centered at 4 in, 8 in and 12 in from one end.
- Depth: 12 in divided by 3 rows is 4 in, so the short strips get slots centered at 4 in and 8 in.
Because the slots are centered on those marks, the end compartments come out about 1/16 in (1.5 mm) larger than the middle ones. Nobody will see the difference.
Cut the strips
Single-wall corrugated cardboard about 1/8 in (3 mm) thick works well. Cut one long and one short strip first and test them in the drawer before cutting the rest. For the example you need:
- 2 long strips, 16 x 2 3/4 in
- 3 short strips, 12 x 2 3/4 in
Lay out every strip so the flutes run vertically, across the 2 3/4 in height. Upright flutes act like tiny columns, so the top edge resists being crushed, and the slots will run along the flutes and cut cleanly between them.
Straight, parallel edges matter more here than in most projects, since a strip that tapers will rock on the drawer floor. The guide on cutting cardboard in straight, clean lines covers the technique in detail.
Safety note
Long cuts and narrow slots with a craft knife are a job for an adult. Use a cutting mat and a metal ruler, make several light passes, keep your fingers behind the cutting path and cut away from your body. Cap or retract the blade when you set it down. A safety cutter with a shielded blade handles the long cuts, and scissors can cut the slots if you snip down both sides and then across the bottom.
Mark and cut the half-height slots
Each slot is as wide as your board is thick and reaches exactly halfway up the strip. In the example, that is 1/8 in wide and 1 3/8 in (3.5 cm) deep, since half of 2 3/4 in is 1 3/8 in.
- Stack the two long strips with their ends flush and mark the slot centers on the top edge at 4 in, 8 in and 12 in. Marking them together keeps the slots in line.
- Draw each slot as two lines, 1/16 in either side of the center mark, running down from the top edge to the halfway line.
- On the three short strips, mark centers at 4 in and 8 in, but draw the slots rising from the bottom edge to the halfway line.
- Cut down both lines of each slot, then across the end, and push out the sliver.

Test the first slot with an offcut of the same board before cutting the rest. The offcut should slide in with light pressure and stay put. If it has to be forced, widen the slot by a hair; a slot that is too tight buckles the strip.
Slide the grid together
Stand the two long strips upright with their slots facing up. Lower each short strip over them, slots facing down, and press until the top edges are level. If one strip sits proud, its slot is slightly short; deepen it a little.

Lower the grid into the drawer. It should touch all four sides without bowing.
Getting a snug fit
A grid that bows is too long. Trim about 1/16 in from one end of the strips that are bowing and try again. Take small amounts; you cannot add length back.
A grid that slides around is too short. Glue a strip of thin paperboard to the end of each loose strip as a shim, or tuck a folded piece of card between the grid and the drawer side.
Doubling strips and covering the edges
For a wide drawer, or for strips taller than about 4 in, glue two layers together with white (PVA) glue and let them dry flat under books for several hours. Doubled strips are roughly 1/4 in thick, so make their slots 1/4 in wide as well.
The top edges are the only part of the grid you see. Fold a strip of paper tape lengthwise over each top edge before cutting the slots, then cut the slots through the tape. The tape hides the corrugation and keeps the edge from fraying as things are lifted in and out.
Changing the layout later
Because nothing is glued, you can lift out a short strip to make one long compartment, or cut a new strip with slots in different places. Keep your sketch so a replacement strip takes minutes.
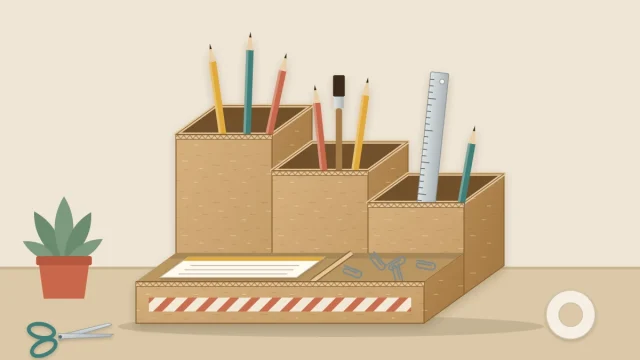
The same slotted strips, cut lower, divide the front tray of a compartment desk organizer. Bulkier things that crowd the drawer are better moved to a storage box with handles on a shelf. The dividers are meant for light, dry household items, so keep them out of damp drawers under a sink.
Frequently asked questions
Do cardboard drawer dividers need glue?
No. The half-height slots lock the strips against each other, and the drawer sides hold the grid in place. Leaving out the glue is what lets you lift a strip out or swap one for a strip with different slot positions when the contents of the drawer change.
How tall should the divider strips be?
Cut them about 1/4 in lower than the inside height of the drawer so the drawer closes without catching. In a very deep drawer you can go lower still, as long as the strips are tall enough to stop the stored items from sliding over the top.
What if my drawer is not perfectly square?
Measure the width at the front and at the back and cut to the smaller number, then test one long and one short strip before cutting the rest. A small gap at one end can be closed with a thin paperboard shim glued to the end of the strip.