Cardboard Bookmarks: 5 Easy Designs From Thin Card
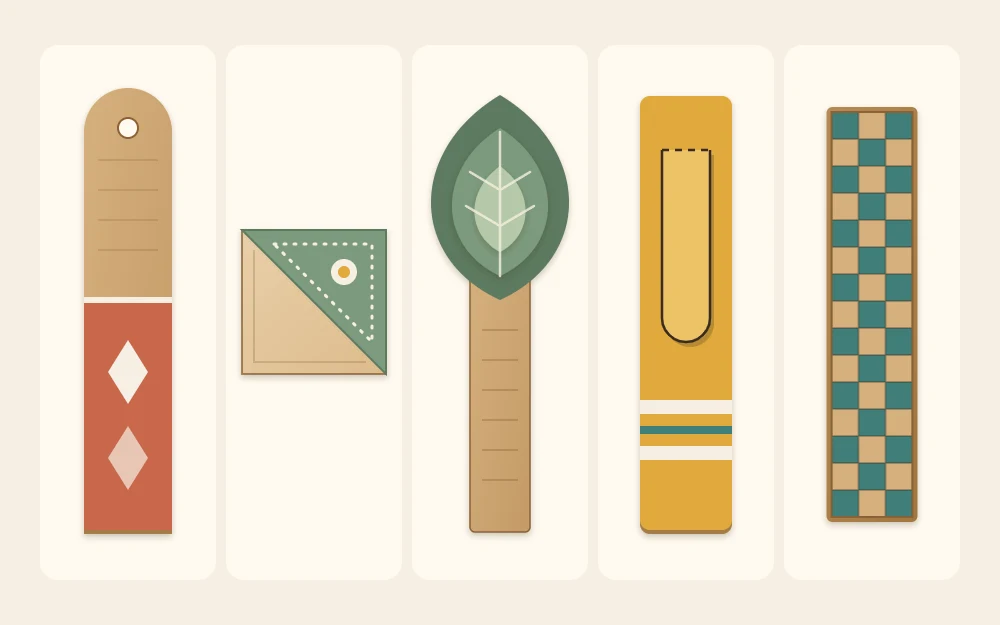
Five scissors-only bookmark designs from cereal-box card, each with measurements: a tasseled strip, a corner pocket, a layered leaf, a tongue clip and a woven strip, plus how to cover them and keep them thin.

Project at a glance
Materials
- Thin paperboard from a clean food box
- Scissors
- Metal ruler and pencil
- Hole punch and yarn or twine
- Glue stick or white (PVA) glue
- Paper tape and decorative paper
Cardboard bookmarks are about the quickest useful thing you can make from an empty cereal-style box. Each one needs a strip of thin card, a pair of scissors and a few minutes, and none of the five designs below needs a knife.
Every design is drawn from a few measurements, so you can change the proportions to suit a pocket paperback or a large cookbook. Make one to test the idea, then cut a small stack while the ruler is out.
Choosing Card and Tools
Thin paperboard, the weight of a cereal box, is the right material. It is stiff enough to stay flat and thin enough to close inside a book without straining the spine. Corrugated cardboard is far too thick for this job. If you are unsure what you have, the guide to the different types of cardboard explains how to tell them apart.
- Thin paperboard, opened out flat, with the plain gray or brown side as your drawing surface
- Scissors, a metal ruler and a pencil
- A hole punch, plus yarn or twine for a tassel
- White (PVA) glue or a glue stick
- Paper tape and scraps of decorative paper
Thin card has a grain, just as corrugated board has a flute direction. Bend the sheet gently both ways and cut your strips so their long side runs in the direction that resists bending more. They will stay flatter.
Design 1: Classic Strip With a Tassel
- Draw a rectangle 2 x 6 in (5 x 15 cm) and cut it out.
- Round the two top corners. Marking 1/2 in (12 mm) along each edge from the corner and joining the marks with a curve gives a neat, even shape.
- Punch a hole centered 1/2 in below the top edge, which is 1 in (2.5 cm) from each side.
- Cut three 8 in (20 cm) lengths of yarn, fold them in half together, push the loop through the hole and pull the tails through the loop.
Design 2: Corner Bookmark
This one is a flat triangular pocket that slips over the corner of a page.
- Draw a 3 in (7.5 cm) square and cut it out.
- Cut the square in half along one diagonal. You now have two matching right triangles.
- Stack the triangles exactly. Cut two strips of paper tape, each 3 in long and about 3/4 in (2 cm) wide.
- Fold one strip of tape over each of the two short edges, binding the triangles together. Leave the long diagonal edge open.
- Trim any tape that sticks out past the points.
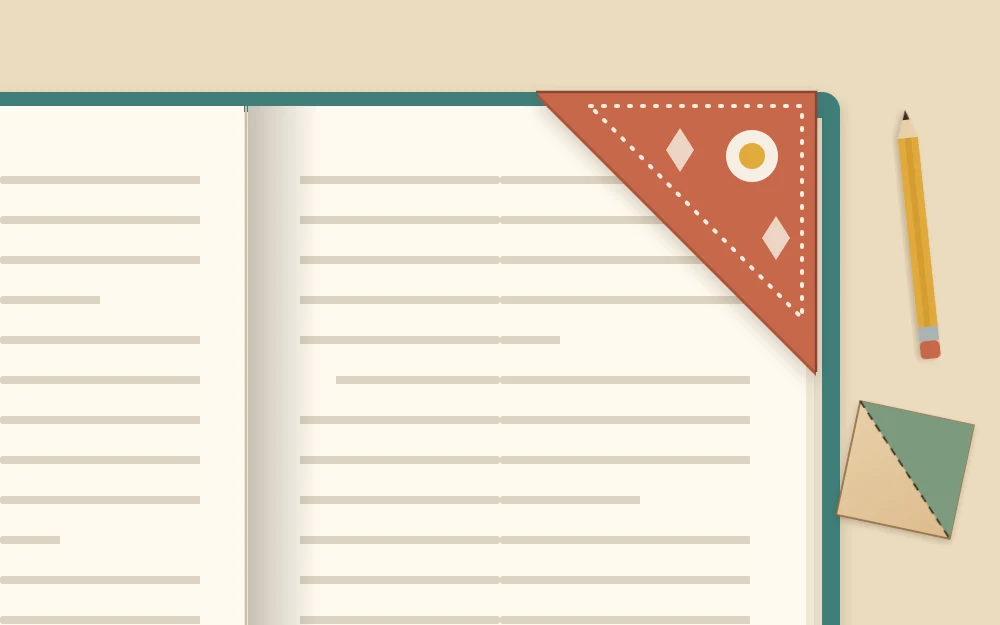
For a thick wad of pages, make the pocket roomier by cutting the front triangle from a 3 1/4 in (8 cm) square instead and letting it bow slightly as you tape it.
Design 3: Layered Shape Bookmark
A plain strip carries a small stacked shape that sits above the top of the book. A leaf works well, and so does a simple house or a cloud.
- Cut a strip 1 1/4 x 5 in (3 x 12.5 cm).
- Draw a rectangle 2 x 3 in (5 x 7.5 cm) and sketch a leaf freehand so that it touches all four sides. Cut it out.
- Draw a second leaf about 1/4 in (6 mm) smaller all around, using the first as a guide, and cut it out.
- Glue the small leaf centered on the large one.
- Glue the stacked leaf to the top of the strip so that they overlap by 1 in.
The finished bookmark is 5 + 3 – 1 = 7 in (about 17.5 cm) long. Keep it to two layers of shape. A third layer starts to leave a dent in the pages.
Design 4: Clip Bookmark With a Cut Tongue
Two scissor cuts turn a strip into a clip that grips a page.
- Cut a strip 1 1/2 x 5 in (4 x 12.5 cm) and round the bottom corners slightly.
- On the bottom edge, mark 1/2 in in from each side. That divides the 1 1/2 in width into three equal parts.
- From each mark, cut straight up the strip for 2 1/2 in (6.5 cm), keeping the cuts parallel.
- Slide the bookmark onto a page with the center tongue in front of the paper and the two outer legs behind it.
The uncut top half stands above the book, so that is the part to decorate.
Design 5: Woven Strip
- Cut a base strip 2 x 6 in. Draw a line across it 1 in below the top edge.
- From the bottom edge, cut three parallel slits up to that line, 1/2 in apart. This makes four fingers, each 1/2 in wide and 5 in long.
- From card or paper in a second color, cut ten cross strips, each 1/2 in wide and 2 1/2 in long. A piece 5 x 2 1/2 in gives you exactly ten.
- Weave the first cross strip over and under the fingers and push it up to the line. Weave the next one under and over. Continue, pushing each row snug against the last.
- Ten rows fill the 5 in of fingers. Put a dot of glue under both ends of every cross strip, then trim the ends flush with the sides.
Tip
Weave with paper strips instead of card if the bookmark is for a slim paperback. The woven section is two layers thick, and paper keeps it from bulging.
Covering, Sealing and Keeping It Thin
The printed side of a food box is rarely what you want to see. The simplest fix is to glue decorative paper over it with a glue stick before you cut the shape, then cut through card and paper together. The edges come out perfectly matched.
Paint is possible, but thin card curls when one face gets wet. Use thin coats on both sides and let the pieces dry flat under a heavy book. A light coat of water-based sealer keeps a bookmark from scuffing. The guide to painting and covering cardboard explains how to stop the curl.
Whatever finish you choose, check the thickness as you go. One layer of card plus paper on each face is ideal. Avoid beads, buttons and thick glued decorations on the part that sits between the pages.
Making a Set to Give
Three bookmarks in related colors, tied together with twine, make a small present that suits almost any reader. Mixing designs works well: one classic strip, one corner and one clip. For more projects in the same spirit, see these handmade cardboard gifts.
Frequently asked questions
Is cereal-box card too flimsy for a bookmark?
No, it is close to ideal. A bookmark only has to stay flat and survive being pulled in and out of a book. A single layer of thin paperboard covered with paper on one or both faces is stiff enough for that and thin enough that the book still closes properly.
How do I stop a painted bookmark from curling?
Curling happens when one face takes on moisture and the other stays dry. Paint both faces with thin coats, let each coat dry, and press the bookmark under a heavy book for a few hours. Covering with paper and a glue stick adds very little moisture and avoids most of the problem.
Can a cardboard bookmark damage a book?
A flat, thin bookmark is unlikely to cause trouble. Problems come from bulk: stacked layers, beads or thick glue between the pages can leave a dent or strain the spine over time. Keep decoration on the part that sticks out of the book and make sure all glue and paint are fully dry first.