How to Make a Cardboard Tray for Keys and Small Items
Build a shallow 8 x 5 in catch-all tray from one shipping box: a simple net with corner tabs, a second base layer for stiffness, a paper lining and a taped rim, with a cutting list and resizing rules.
Project at a glance
Materials
- Single-wall corrugated cardboard
- Decorative paper for the lining
- Paper tape, about 1 in wide
- White (PVA) glue and a glue stick
- Metal ruler, pencil and scoring tool
- Craft knife and cutting mat, or scissors
- Four clothespins or binder clips
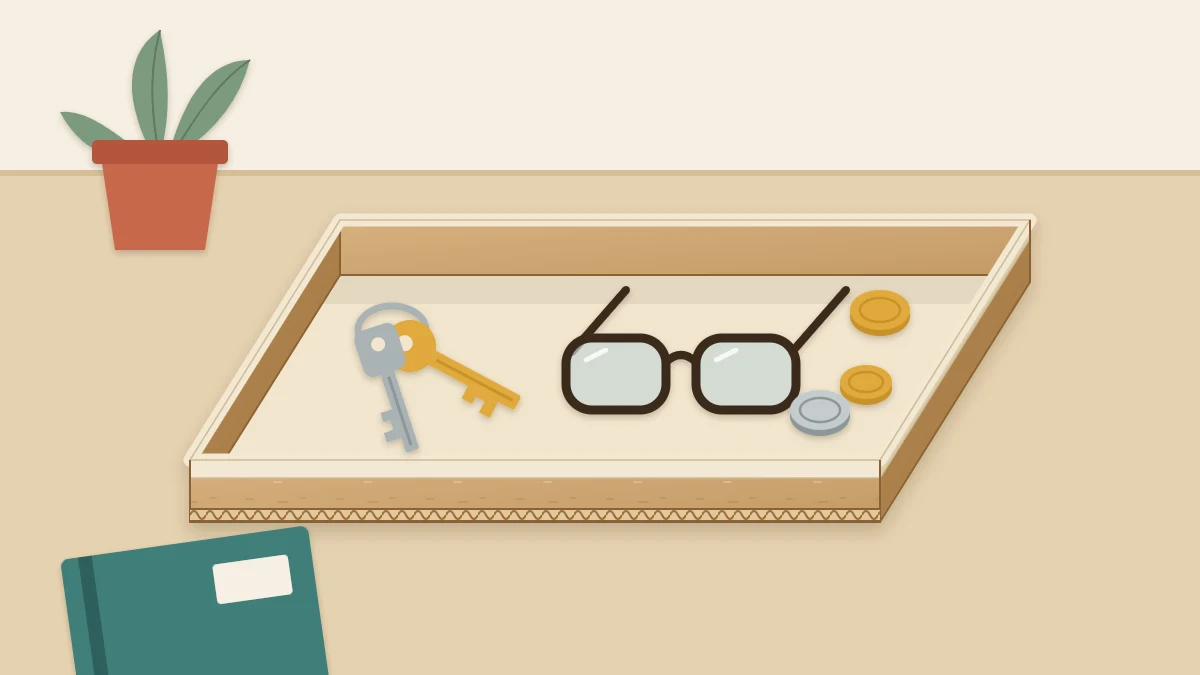
Keys, coins and glasses tend to land wherever there is a flat surface. A shallow cardboard tray gives them one place to go, and you can make it from a single shipping box.
This version is about 8 x 5 in (20 x 12.5 cm) with 1 in (2.5 cm) walls. It has a double-layer base so it does not flex when you pick it up, a paper lining, and a taped rim that hides the corrugated edge.
Materials and Cutting List
- Clean single-wall corrugated cardboard, roughly 1/8 in (3 mm) thick
- Decorative or plain paper for the lining
- Paper tape, about 1 in wide
- White (PVA) glue and a glue stick
- Metal ruler, pencil and a blunt scoring tool
- Craft knife and cutting mat, or strong scissors
- Four clothespins or binder clips
| Piece | Size | Quantity |
|---|---|---|
| Tray net (corrugated) | 10 x 7 in (25 x 17.5 cm) | 1 |
| Inner base (corrugated) | 7 3/4 x 4 3/4 in (19.7 x 12 cm) | 1 |
| Lining paper | 9 1/4 x 6 1/4 in (23.5 x 16 cm) | 1 |
Safety note
Cutting with a craft knife is a job for an adult. Work on a cutting mat with a metal ruler, make several light passes instead of one hard one, keep your fingers behind the cutting path and cut away from your body. Use a sharp blade and cap or retract it when you put it down. Scissors with thin paperboard also work for this project.
Draw and Cut the Tray Net
The net is the base with a wall on every side: 1 + 8 + 1 = 10 in long and 1 + 5 + 1 = 7 in wide.
- Mark out a 10 x 7 in rectangle, measuring from a straight edge of the sheet.
- Draw a line 1 in inside each of the four edges. The 8 x 5 in rectangle in the middle is the base, the four strips around it are the walls, and the four 1 x 1 in corner squares hold the glue tabs.
- Keep one tab at each end of the two long walls. In each corner square, mark a line 3/4 in (2 cm) from the end of the long wall. The 3/4 x 1 in piece next to the long wall is the tab, and the remaining sliver is waste.
- Cut out the rectangle. At each corner, cut between the corner square and the short wall, stopping at the corner of the base, then trim off the waste sliver.
- Score the four sides of the base and the four lines where the tabs meet the long walls.
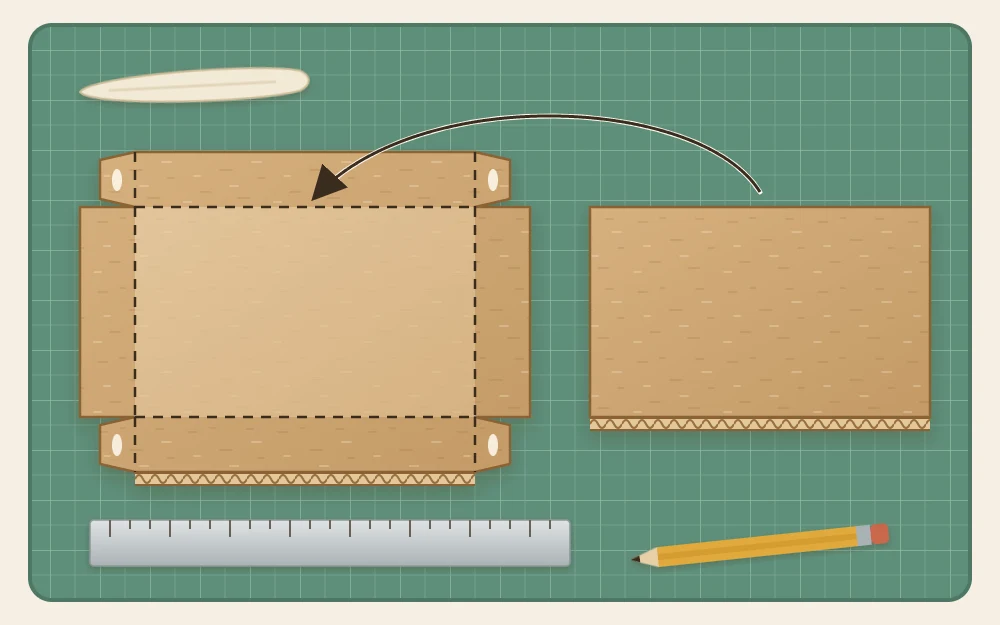
This is the same cross-shaped net used in the easy first cardboard box, only wider and shallower. That tutorial walks through the tab layout step by step.
Fold and Glue the Walls
- Fold all four walls up and the tabs inward as a dry fit. Each tab should lie flat against the inside of a short wall.
- Spread a thin layer of white glue on the outer face of one tab, press it to the inside of the short wall and hold it with a clip.
- Repeat at the other three corners, keeping the top edges level.
- Leave the clips in place for roughly 20 to 30 minutes.
Add the Second Base Layer
A single layer of corrugated board bends easily along its flutes. A second layer with the flutes turned the other way stops that. Cut the inner base so its flutes run across the direction of the flutes in the tray floor.
The inner base is smaller than the floor by two board thicknesses in each direction: 8 in minus 1/4 in (6 mm) gives 7 3/4 in, and 5 in minus 1/4 in gives 4 3/4 in. It should drop in without bowing the walls. Crossing the flutes is one of several methods explained in the guide to making cardboard stronger.
Line the Inside With Paper
Covering the inner base before it goes in is easier than papering a finished tray. The paper is 3/4 in larger than the inner base on every side: 7 3/4 + 1 1/2 = 9 1/4 in and 4 3/4 + 1 1/2 = 6 1/4 in.
- Lay the lining paper face down.
- Coat one face of the inner base with glue stick and press it onto the center of the paper. Turn it over and smooth the paper from the center outward.
- Cut across each paper corner at an angle, leaving about 1/8 in of paper beyond the corner of the board.
- Glue the long margins over onto the back, then the short ones.
- Spread white glue thinly over the tray floor, press the covered base in, paper side up, and weigh it down with a couple of books while it dries.
If you prefer paint to paper, read about painting cardboard without warping it first.
Tape the Rim
A band of paper tape folded over the top edge hides the wavy inner layer.
- The rim measures 8 + 5 + 8 + 5 = 26 in (66 cm) around. Cut about 27 in (69 cm) of tape so the ends overlap.
- Start in the middle of a long wall. Stick half the width of the tape to the outside of the wall, with the other half standing above the edge.
- At each corner, snip the standing half down to the rim so it can fold without bunching.
- Fold the tape over the edge and press it down against the inside of the wall.

Resizing and Using the Tray
To change the size, work out three things:
- Net: base length plus twice the wall height, by base width plus twice the wall height
- Inner base: base length and width, each minus two board thicknesses
- Rim tape: twice the length plus twice the width, plus 1 in of overlap
A 12 x 6 in (30 x 15 cm) desk tray with 1 1/2 in (4 cm) walls needs a net of 15 x 9 in (38 x 23 cm), an inner base of 11 3/4 x 5 3/4 in and about 37 in (94 cm) of tape.
Tip
If your cardboard is too small for the full net, cut the 8 x 5 in base on its own and make the walls from one strip, 1 in tall and 26 3/4 in (68 cm) long. Score it at 8, 13, 21 and 26 in, fold it into a frame, glue the 3/4 in tab, and fix the frame on top of the base with glue and paper tape along the outside.
The tray is meant for light, dry items. Keep wet and hot things off it, because moisture and heat soften the board and lift the paper.
Frequently asked questions
Why does the tray need two base layers?
A single sheet of corrugated board bends easily in one direction, along its flutes, so a wide shallow tray can sag when lifted by one end. Gluing in a second layer with the flutes turned the other way makes the floor noticeably stiffer, and it also gives you a neat way to add the paper lining.
Can I put a plant pot or a drink on a cardboard tray?
It is better not to. Moisture softens cardboard, loosens glue and makes the paper lining bubble, and heat from a mug can mark it. Even with a water-based sealer on top, treat the tray as a place for light, dry things such as keys, coins, glasses and stationery.
What can I use instead of paper tape on the rim?
A strip of the lining paper works well. Cut it about 1 in wide, glue it with a thin coat of white glue and fold it over the edge in the same way. Masking tape also folds neatly and can be painted afterward. Whichever you choose, snip the strip at each corner so it turns cleanly.