Cardboard Craft Tools: A Simple Starter Kit
The six basic tools that cover almost every beginner cardboard project, what each one does, the optional extras worth adding later, and what you can happily leave off the list.
You can spend a lot on craft supplies before making anything, and with cardboard there is no need. The material is free, and the tools that shape it are mostly ordinary household items.
This list of cardboard craft tools is split into a minimum kit that covers nearly every beginner project, a handful of optional extras, and the things that can wait until you know you enjoy the hobby. Everything is described by type, so you can use what you already own.
The minimum kit at a glance
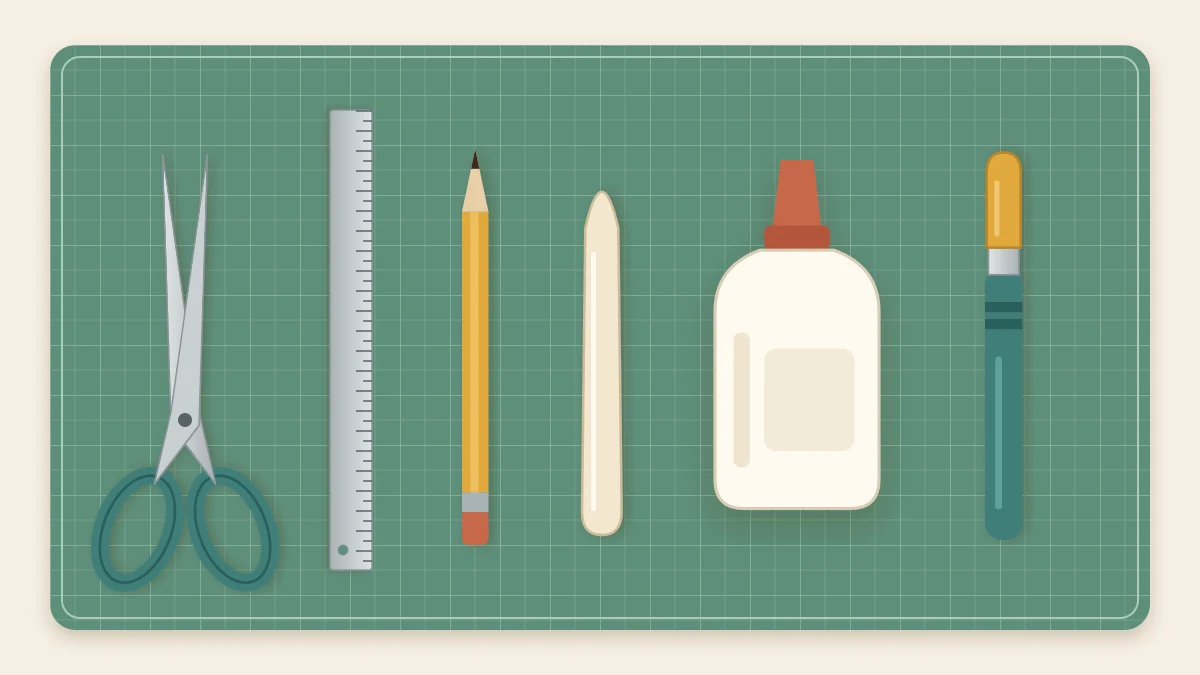
Six items are enough to measure, cut, fold and join cardboard accurately:
- A pair of sharp scissors
- A metal ruler
- A pencil and eraser
- A cutting mat
- White (PVA) glue
- A blunt scoring tool
If you are missing one or two, start anyway. A project made with scissors, a pencil and glue teaches more than a week of shopping. The beginner’s overview of cardboard crafting explains how these tools fit into your first few builds.
Tools for measuring and marking
Metal ruler
A 12 in (30 cm) metal ruler does three jobs: measuring, guiding the pencil, and guiding a blade or scoring tool. Metal matters because a plastic or wooden edge gets nicked, and a nicked edge gives wavy lines from then on. A ruler with a cork or rubber backing slips less on smooth board.
Pencil and eraser
A reasonably hard pencil, kept sharp, gives a fine line that is easy to follow and easy to remove. Soft pencils smudge onto the liner and show through light paint. Press lightly; a deep pencil groove can show on the finished surface.
Something square
A set square is useful but not essential. The corner of a sheet of printer paper is a true right angle and checks a corner just as well.
Tools for cutting
Scissors
Good household scissors cut thin paperboard cleanly and manage short cuts and curves in single-wall corrugated cardboard. Keep one pair for cardboard and paper only, since cutting tape leaves glue on the blades. Many beginner projects can be made with scissors and thin board alone.
Cutting mat
A self-healing cutting mat protects the table and gives a firm, slightly grippy surface to work on. Even if you only use scissors, it is a pleasant base for scoring and gluing. A mat around 12 x 18 in (30 x 45 cm) suits most small projects.
The full method for clean lines, curves and windows is covered in the guide to cutting cardboard cleanly and safely.
Tools for scoring and folding
To score a fold line, you press a groove into the board without breaking the surface. Any smooth, blunt tool will do it.
- A bone folder. This is a flat, polished creasing tool with a rounded tip. It scores, sharpens folds and smooths down glued paper. You can read more about what a bone folder is and how it is used.
- A butter knife. The rounded back of the blade makes a good groove in corrugated board.
- An empty ballpoint pen. A pen that has run dry works well on thin paperboard.
- A spoon handle. Useful for wide, soft scores across the flutes.
Whichever you choose, run it along the metal ruler, not freehand.
Tools for joining
White glue
White (PVA) glue is the default adhesive for cardboard. It soaks slightly into the paper fibers, dries clear and forms a firm bond. A small bottle with a narrow nozzle is easiest to control. Joints are firm enough to handle after roughly 20 to 30 minutes and reach full strength after several hours or overnight.
A glue spreader
A strip of scrap cardboard or an old, stiff paintbrush spreads glue into a thin, even film. Thin coats grip faster and warp the board less.
Other adhesives, such as tacky glue, glue sticks and paper tape, have their uses too. The article on choosing glue and making strong joints compares them side by side.
Optional extras worth adding
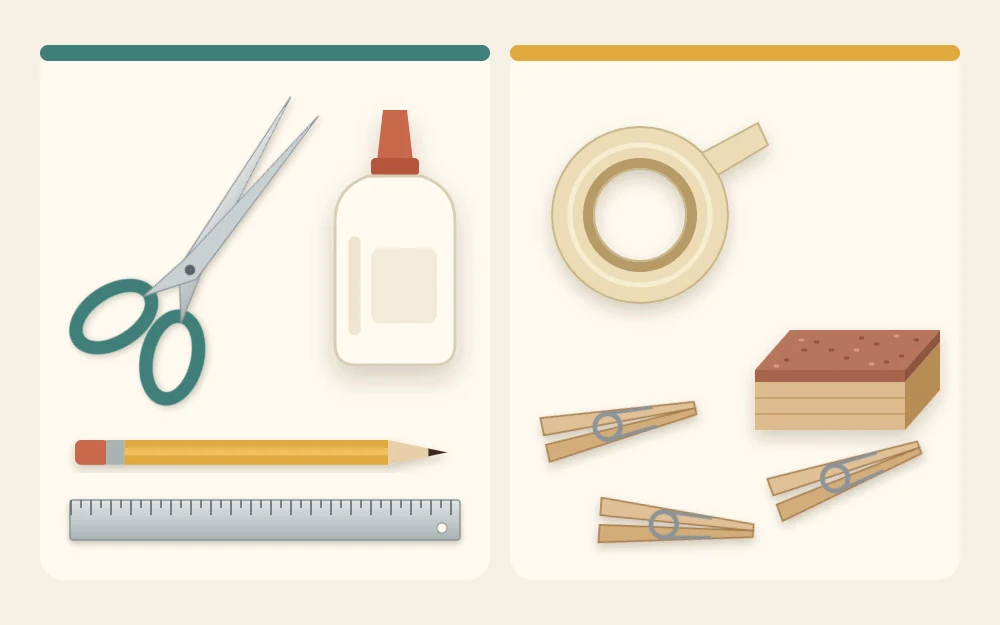
Clothespins or binder clips
These act as small clamps, holding a glued corner or tab while it sets so you do not have to. A dozen wooden clothespins handle most box corners. Binder clips grip harder; slip a scrap of board under the jaws so they do not dent the surface.
Masking tape or paper tape
Masking tape holds parts in position during a dry fit and peels away afterward. Paper tape binds raw edges and reinforces corners, and it takes paint.
Sanding block
A fine sanding block tidies fuzzy cut edges and rounds sharp corners. Use light strokes only, and sand over scrap paper so the dust is easy to fold up and throw away.
Craft knife or safety cutter
A craft knife gives the cleanest straight lines in corrugated board and makes inside cuts such as frame windows possible. It is a job for an adult. A safety cutter with a shielded blade is a good alternative for straight cuts, and scissors remain the right choice for thin board.
Safety note
Use a craft knife only on a cutting mat, guided by a metal ruler. Make several light passes instead of one hard one, keep your fingers behind the cutting path, and cut away from the body. A sharp blade is easier to control than a dull one. Cap or retract it whenever you put it down.
What can wait
Some tools are pleasant to own but not needed for a first season of projects:
- A compass and circle cutter. A jar lid or a plate traces most circles well enough.
- A hole punch. Handy for tags and garlands once you make them regularly.
- Low-temperature hot glue. Some adults like it for instant grab on decorative parts. It can still burn skin, and white glue makes the neater, stronger joint.
- Acrylic paint, brushes and water-based sealer. Add these when a project calls for color; plain kraft board looks good on its own.
Keeping the kit in good order
Tools last longer and work better with a little care. Wipe glue from the ruler edge and scissor blades before it dries. Store the cutting mat flat and away from heat so it does not curl. Keep the glue nozzle clear by wiping it and closing the cap after each session.
Keep everything together in one shallow box so the whole kit comes out in a single trip.
With the basics gathered, the best next step is to use them. The roundup of quick cardboard projects for an afternoon has plenty that need nothing beyond this starter kit.
Frequently asked questions
What can I use instead of a bone folder?
Any smooth, blunt edge will score cardboard. The back of a butter knife works well on corrugated board, an empty ballpoint pen suits thin paperboard, and a spoon handle makes a wide, soft groove. Guide the tool along a metal ruler and press firmly enough to dent the surface without tearing it.
Do I really need a cutting mat?
If you use a craft knife or safety cutter, yes, because the mat protects the table and keeps the blade from skidding. With scissors alone it is optional, although a mat still gives a firm, clean surface for marking, scoring and gluing. A thick piece of scrap board is a workable stand-in at first.
Which glue should a beginner buy for cardboard?
Plain white PVA glue is the most useful single adhesive. It bonds cardboard firmly, dries clear, cleans up with water and gives you a little time to adjust parts. Apply it in a thin film, hold the joint with clothespins, and let it dry for several hours before putting the project to use.