Cardboard Craft Mistakes: 10 Common Problems and How to Fix Them
Ten common reasons cardboard projects come out crooked, warped or ragged, each with its cause and a practical fix, plus a short routine that prevents most of them next time.

A first box that leans, a lid that will not sit flat, an edge that looks chewed: almost everyone who starts working with cardboard produces a few of these. The good news is that the causes are few and well understood.
The ten cardboard craft mistakes below account for most crooked, warped or ragged results. Each one comes with its cause and a practical fix, grouped by the stage of the project where it happens, so you can go straight to the problem in front of you.
Cutting problems
1. Crushed flutes
What you see: a flattened, dented band along the cut, or soft spots in a panel.
Cause: too much pressure. Scissors squeeze corrugated cardboard before they slice it, and leaning hard on a ruler or kneeling on a sheet collapses the flutes underneath.
Fix: use scissors for thin paperboard and short cuts only. For long straight cuts in corrugated board, use a safety cutter with a shielded blade, or have an adult use a craft knife on a cutting mat with a metal ruler and several light passes.
2. Ragged, torn cuts
What you see: fuzzy edges, torn liner, a cut that drifts away from the line.
Cause: a dull blade, or trying to get through the board in a single hard stroke. A dull edge drags the paper instead of parting it.
Fix: change or snap off the blade as soon as it starts to pull, and let light, repeated passes do the work. With a knife, keep fingers behind the cutting path, cut away from the body, and cap or retract the blade when you set it down. The guide to getting clean, straight cuts covers the full method.
Folding problems
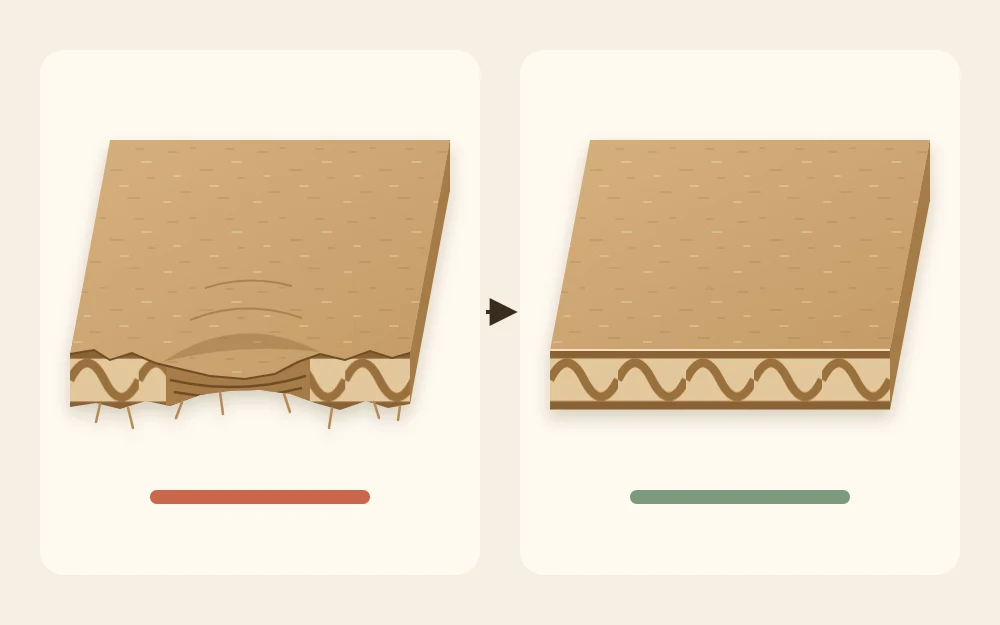
3. Folds that crack or wander
What you see: the outer liner splits along the bend, or the fold lands beside the pencil line.
Cause: the line was not scored. Without a groove, the board bends wherever it is weakest.
Fix: score every fold before bending. Run a blunt tool, such as a bone folder or the back of a butter knife, along a metal ruler to press a groove without cutting. Then fold over the edge of the table for a straight, even bend.
4. Folding against the flute direction
What you see: one pair of walls folds neatly while the other pair is lumpy and springs back.
Cause: corrugated board has a grain. It bends easily along the flutes and resists when you fold across them.
Fix: check the flute direction before you draw anything, and lay out the net so the most important folds run along the flutes. For folds that must cross them, score more firmly, in two passes, and work the fold back and forth gently before gluing.
Measuring and fitting problems
5. Measuring from a crooked edge
What you see: parts that should be rectangles come out as slight parallelograms, and corners refuse to meet.
Cause: trusting the factory edge of a box panel. Those edges are often torn, crushed or simply not square.
Fix: cut one fresh straight edge first and treat it as your reference. Take every measurement from that edge, mark each line with two points, and check corners against a set square or the corner of a sheet of printer paper.
6. Glue tabs that are too narrow
What you see: corners that pop open as soon as the clips come off.
Cause: not enough contact area. A sliver of a tab gives the glue almost nothing to hold.
Fix: make each glue tab at least 1/2 in (12 mm) wide on small projects and about 3/4 in (2 cm) on larger ones. Trim the tab ends at a slight angle so they tuck inside without bunching at the corner.
7. Skipping the dry fit
What you see: a lid that is too tight, a divider that is too long, discovered only after the glue is on.
Cause: assuming the drawing was right. Board thickness adds up, and single-wall corrugated at roughly 1/8 in (3 mm) per wall quickly eats into a snug fit.
Fix: always dry fit. Assemble the parts without glue, holding them with masking tape or clips, and trim anything tight before you commit.
Glue and paint problems
8. Warping
What you see: a flat panel curls into a shallow bowl as it dries.
Cause: moisture on one face. Thick glue or wet paint swells the paper fibers on that side, and they shrink again as they dry, pulling the sheet into a curve.
Fix: spread white glue in a thin, even film instead of leaving beads and puddles. When painting, use thin coats and treat both faces so the pull is balanced, then dry the piece flat under a light weight with parchment or scrap paper in between. More detail is in the guide to painting and covering cardboard without warping.
9. Rushing the drying time
What you see: joints that slide out of square, or a box that comes apart when first used.
Cause: handling the piece while the glue is still soft. White glue is firm enough to handle after roughly 20 to 30 minutes, but it needs several hours or overnight to reach full strength.
Fix: clip or tape each joint, check it is square, and walk away. The article on adhesives and strong cardboard joints explains which glue suits which joint.
Finishing problems
10. Visible corrugation on the edges
What you see: a neatly built piece that still looks like a cut-up box, because the wavy edges are on show.
Cause: the edges were left raw. Open flutes catch the eye, collect dust and soak up paint unevenly.
Fix: plan an edge finish from the start. Binding with paper tape, gluing on a paper strip or folding a flap over the edge all hide the flutes. The roundup of ways to hide corrugated edges compares the options and when each is worth the effort.
A short routine for the next build
One early error usually causes several later ones: a crooked reference edge leads to uneven walls, gaps at the corners and a lid that rocks. Most of these problems disappear with the same handful of habits, done in the same order every time:
- Cut a true reference edge and note the flute direction.
- Measure twice, marking folds and cuts differently.
- Cut with a sharp tool and light pressure.
- Score every fold line before bending.
- Dry fit, adjust, then glue thinly and clip.
- Let it dry fully before finishing the edges and surfaces.
None of this takes special skill, only a little patience. Remake the piece that went wrong, change one thing, and compare the two side by side.
Frequently asked questions
Why does my cardboard warp after gluing or painting?
Water from glue or paint swells the paper on one face, and as it dries that face shrinks and pulls the sheet into a curve. Use thinner coats, treat both sides of the panel, and let it dry flat under a light weight with a sheet of scrap paper in between.
Can I flatten a cardboard panel that has already warped?
Often, yes. Lightly dampen the hollow side with a barely wet cloth or a thin coat of paint, then press the panel flat between sheets of scrap paper under a few books until it is completely dry. Badly curled or creased panels are quicker to cut again than to rescue.
Why won't my box corners stay square?
The usual causes are parts measured from a crooked edge, glue tabs that are too narrow to hold, or joints handled before the glue has set. Cut a true reference edge, widen the tabs, clip each corner, and check it against something square while the glue is still soft.